
It offers the most natural way to make music by simply using your touch screen or your hand in front of the web cam. If you don’t have these you can also use your mouse.
Creating your favourite instrument is also very easy: you need a couple of seconds of the sound that your instrument will make and import it as a WAV file. It will be converted to an instrument and you can still adjust the individual frequencies of your instrument.
In the settings window you can adjust the attack time of your instrument, short attack time means the volume and frequency of you instrument is reproduced almost instantly like with a piano or a triangle. Longer attack times sound more like a flute or violin.
The release time defines how long it takes for the sound of a note to fade away.
Also in the settings window you can select the lowest and the highest playing notes for the main playing window.
There are 2 playing modes: fluent frequencies (like with a violin) or standard notes like with a piano. Low notes are on the left and high on the right. The upper part corresponds to higher volume and below to lower volume.
When you are happy with your playing skills you can decide to record your music by clicking on the record button which will save it to a WAV file.
System requirements: Windows 7 or later, Touch screen or Webcam are recommended.
Touch Space Synth Home 32bit SSE3 Dual core (cpus from 2005 or later)
Touch Space Synth Pro 32bit SSE3 Dual core
Touch Space Synth Pro 64bit AVX+FMA Dual core (note: pentiums and celerons often don't support AVX+FMA)
Touch Space Synth Extreme 64bit AVX+FMA Quad core
The functionality of the different editions:
Compared to the home edition the 32bit Pro edition has midi support and extra functions to adjust frequency bands. The Pro version also allows you to disable specific notes so playing is easier without accidentally hitting the wrong notes. The example instruments have disabled the "black" notes so it sounds nicer when testing this.
Also the Pro edition allows you to export an instrument as a wav sample.
The 64bit Pro edition has more processing power and for that has half the latency compared to the 32bit Pro version, this means the sound of a note is reproduced faster.
The 64bit Extreme edition has 4x the amount of frequency bands so transition between frequencies is smoother but also it allows for much lower frequencies. This is why a 4 core processor is recommended because it takes more power to reproduce sound.
Second difference is the tone scale is expanded the full scale midi range (note 0 till 127). If you only use MIDI output than you can also run it on a dual core processor.
Please note that the extreme edition has a longer loading time than the other editions.
You can enjoy these programs 30 days for free, after that you will need to register.
Pro and Extreme edition version 2.2.2 and try for maximum 30 days for free without paying:

Screen shot of the Control Panel of GiMeSpace TouchSpace Synth Pro:
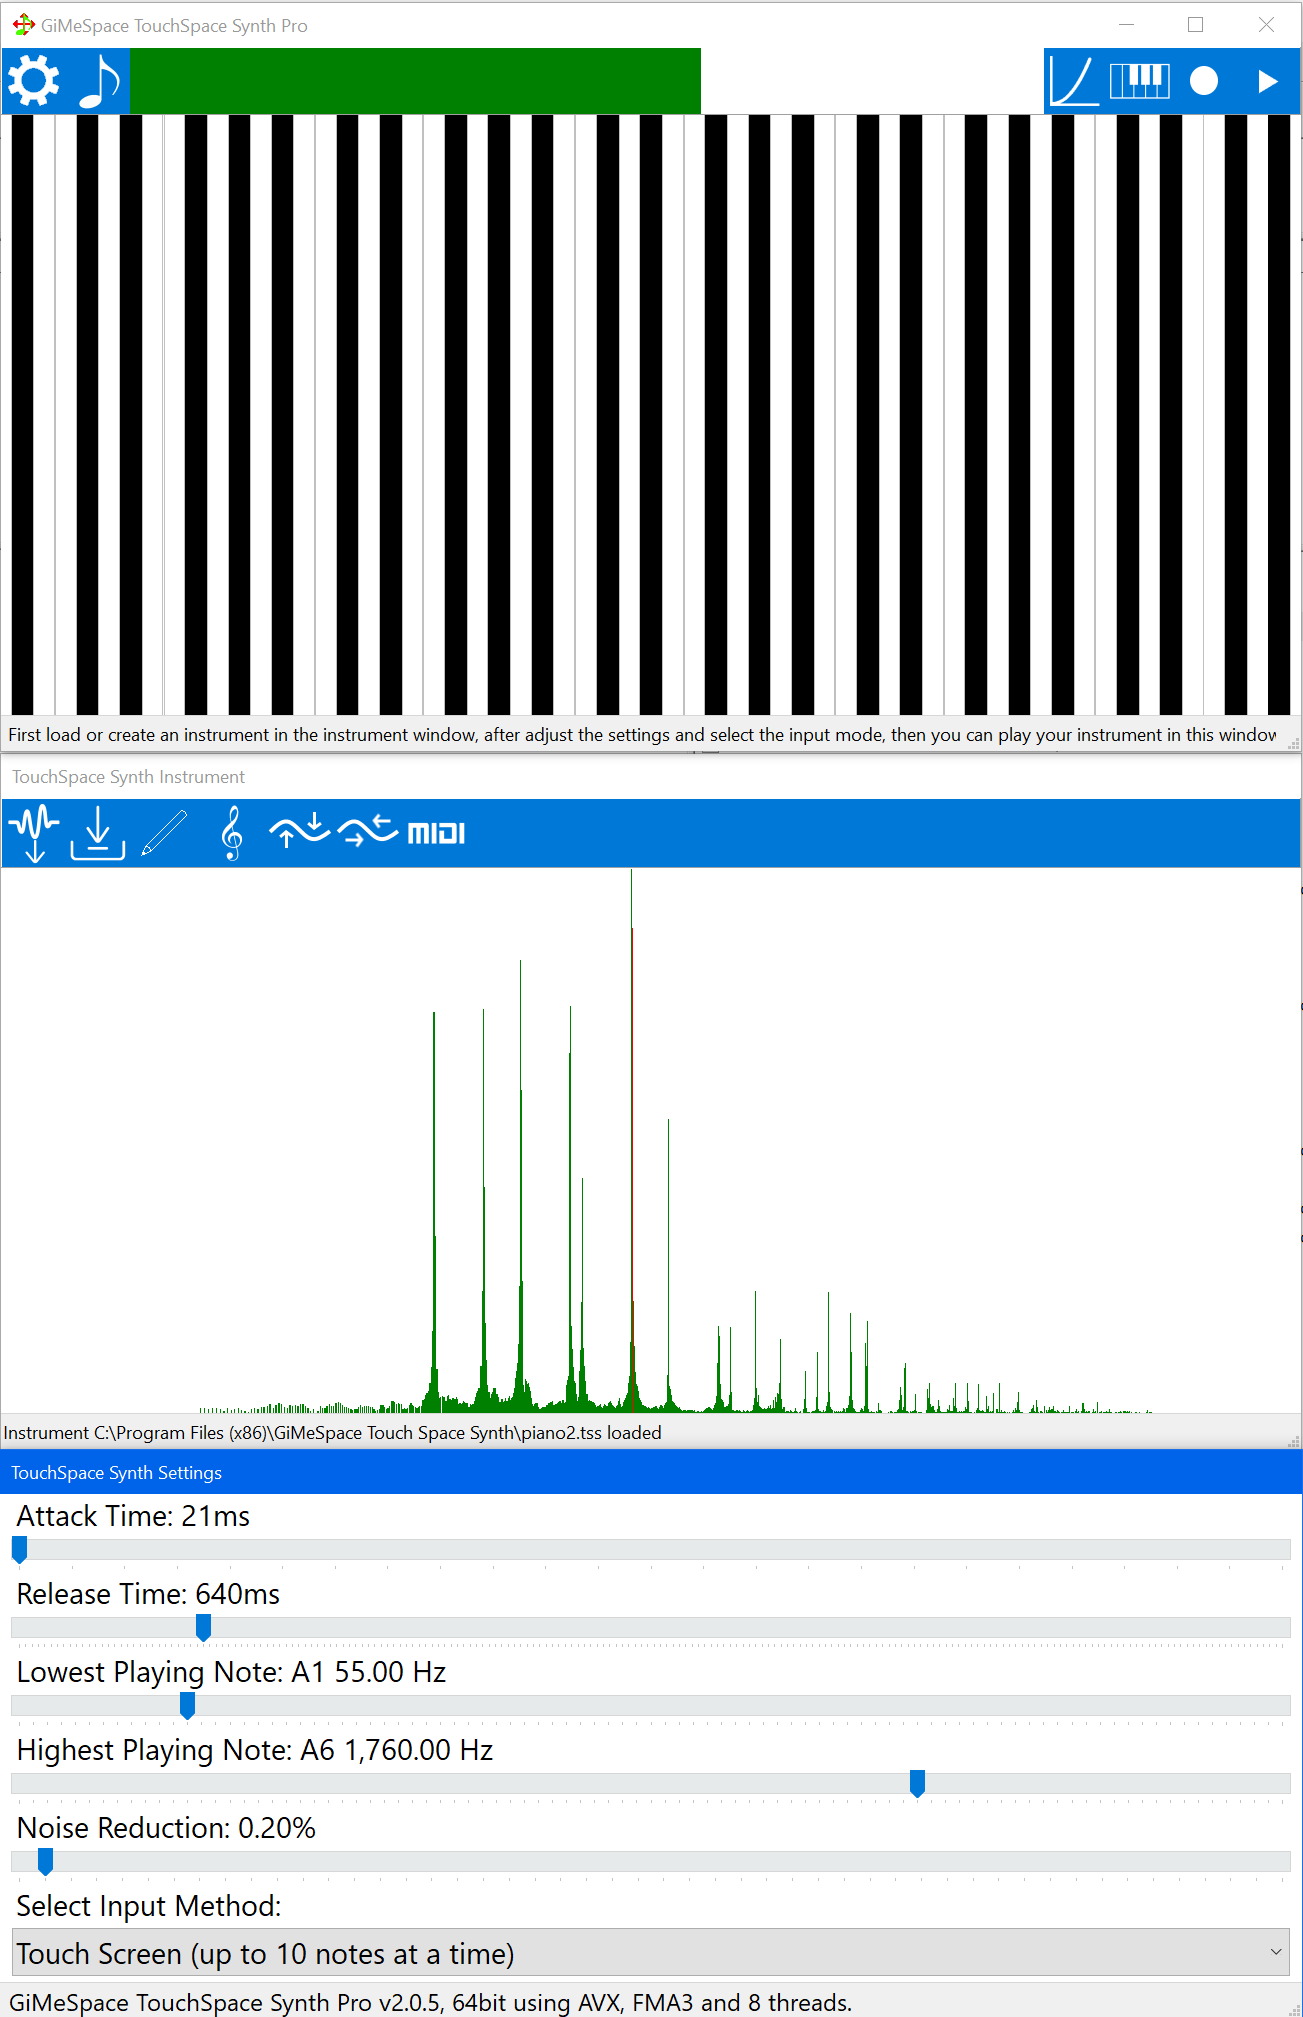
How to start making music:
Click on the music note icon to open the instrument window. Here you can draw with the pencil the frequencies of your instrument. You can create your own but in most cases it is easier to use the pencil to adjust an existing instrument.
There are also two buttons for adjusting frequency bands to lower and higher frequencies or to increase or lower the volume of a frequency band.
You can load an existing instrument with the import button. There are a few examples in the TSS file format distributed with this program (TSX for extreme edition).
Probably more interesting is for you to create your own instrument by importing your favourite instrument in the WAV format. You need a WAV sample with at least 32768 samples. On a 48000hz sample frequency this means you need at least 0.69 seconds of sound from you instrument but it is recommended to have twice that amount but not more than a few seconds of sound. A sound editor like Audacity is very useful to prepare a WAV sample. The extreme edition needs 4x more samples, so that would be minimum 2.8 seconds of sound.
You can also import samples on different sample frequencies, they will be converted to the reproduction frequency at 16bit 48000Hz (DVD quality).
When importing a sample this program automatically detects the main frequency but you can select a different frequency if needed.
In the settings window you can adjust the attack time of your instrument, short attack time means the volume and frequency of you instrument is reproduced almost instantly like with a piano or a triangle. Longer attack times sound more like a flute or violin.
The release time defines how long it takes for the sound of a note to fade away.
Also in the settings window you can select the lowest and the highest playing notes for the main playing window. If you want to make sure you accurately hit the right notes then it is better to have de distance between the lowest and highest note as small as possible.
The noise reduction value selects how much noise is removed from the instrument (when changing the value but also when importing a WAV file) 0.2% usually works well. It is important to have a clean instrument with little noise because extra frequencies take extra processor time to reproduce.
As input method the touch screen is most useful, also because it allows up to 10 notes to be played at the same time. You can also select a webcam which is fun to make music by moving you hand in the air, if you have none of these you can always select the mouse as input.
If you select the webcam then also the mouse or touch screen input method will stay active, but it is only possible to deactivate the webcam again by restarting the program. Best webcam resolution is usually something like 640x360. The 16bits YUY Videoinfo format is usually the fastest, if you have to use 24bits MPEG format then it is best to select a Videoinfo2 format because it is slightly faster.
The webcam sensitivity that works best depends on the light sources and background you are using. Best is that your hands have a different colour than the background. So make sure the background is of a plain colour. Pointing the webcam above your head is wise to avoid your head movements to interfer. A great trick is wearing gloves in a different colour than your background. Usually you need a webcam sensitivity of around 80%, set it as low as possible so that it still detects all your hand movements.
In the main window you can click the play button to start playing your instrument. There are 2 modes: fluent frequencies (like with a violin) or standard notes like with a piano. Low notes are on the left and high on the right. The upper part corresponds to higher volume and below to lower volume notes. When using your hands the camera reacts to movements so it makes sense to point the camera above your head. To release a note you need to move your hand down. For mouse and touch screen this is not needed, you simply release your finger.
The green bar is to adjust the volume, if you see a red line in the green during playing it means that clipping is happening and it makes sense to set the volume a bit lower. When you have plugged in a MIDI keyboard to your computer then you can also opt now for using this. Please note that if you use a MIDI keyboard for input, you cannot use MIDI for output.
When you are happy with your playing skills you can decide to record your music by clicking on the record button which will save it to a WAV file.
If you experience interrupted playback or glitches this means that your system is not having enough power available for this program. Please close any background programs (also from the system notification area and start up list). Try to set your power scheme to maximum performance. Also disable any advanced sound effects in your audio playback driver like bass boost or 3d surround effects. If this all still doesn’t help you might need to remove some unneeded frequencies from your instrument by hand or using the noise reduction option.
In rare cases, usually when you have used other programs with audio output or you have programs like SRS Audio Sandbox, the audio timing gets mixed up, restarting the program sometimes helps, restarting the computer will usually help.
If you don't hear any sound at all in the 64bit and extreme edition then this means your system is not capable to reproduce low latency sound, use the 32bit version instead or use the MIDI output. (In case you really need the extreme edition on a bigger latency you can email gimespace@gimespace.com)
It is also possible to use an external MIDI device or external program to produce the sound output. For programs like FL studio, LMMS, VST hosts, etc you need to install a MIDI loop driver, this is like the virtual cable that connects 2 devices.
These are available:
MidiYoke (free but only 32bit)
LoopBe1 (32&64 bit, free for personal use)
LoopMidi (32&64 bit, free for personal use)
After installation of one of these you need to make sure you assign both programs to the same midi port and select the same midi channel. Then this program is like an external keyboard: Volume, velocity and after touch are all supported by going up or down within the bar of the same note.
For any suggestions, requests, custom builds, etc, you can email gimespace@gimespace.com